Sometimes you just need something fun to do with your kids when they’re claiming boredom or that there’s nothing to do. If this sounds like you, then head over and visit today’s guest–Randi from
Sowdering About in Seattle for some fun ideas along with lots of color, crafts, and other fun things. And today she’s got a polymer clay necklace project that I’m sure my 4-year-old would love making!
++++++++++++++++++++++++++++++++++++++++++++++++++
Hey everyone, my name is Randi and I blog over at
Sowdering About in Seattle. I am so happy to be here today posting for Lisa while she takes care of her new baby! I remember those days of newborn
madness bliss so I wish her and her family all best!
A month ago, my two nieces came up for a visit from Las Vegas. I was trying to wrap my head around what to do with an 8 and 12 year old while they were here and came across Sculpey polymer clay. Apparently I am also the last person on the planet that had never played with it before because when I talked about how awesome it was, everyone was like “Oh yea, that stuff we played with as kids!” Well I had never played with it kid. But now, I am making up for it.
The girls and I made a million things while they were here, but it wasn’t until after they left when I started thinking they would make a super fun addition to my
magnet necklaces that I started making recently!
For this particular charm, you need 2-3 (or more if you are adventurous) colors of clay. I am using the quarter here to show how big the amount of clay you need is. And really, you don’t even need this much. This amount made two charms.
After you smoosh it around in your hands for a bit to warm it up, you need to roll it out into a little “snake.”
Make each color into a “snake.” As you can see below next to the sharpie, this is about what size they should be.
Carefully push them together so they stick.
Next you want to make sure to carefully roll them together to make one large snake. Don’t push them too hard together or they will start to blend and you don’t want that. You want them to swirl.
When you get a good swirl, roll it out so it’s a thin snake. When it’s thin enough, then you want to start to twist it like you see below:
As I was spiraling it, I also twisted the clay so that different colors would show in different areas. It was fun to just play with it to see how it would turn out. As you can see below, I had about twice what I really needed for one charm, but that’s ok, I can always make another.
When I was done with the swirl, I threw it in the oven for 15 minutes at 265. After it was cooled, I put a sparkle Mod Podge on it to give it a little shine.
I got impatient waiting for it to try so I used my blow dryer to dry the Mod Podge. And to glue it to the magnet I used my good ol’ E6000 which might actually be the best glue ever invented.
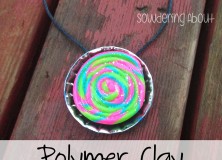
When the glue was dried, I grabbed my little bottle cap necklace and just put it on! And look, magic! I love the colors of this polymer clay necklace charm, it’s so summery and even looks like those huge lollipops you get in Disneyland right? The possibilities are endless with this magnetic charm idea! Make sure to stop by my blog and follow along with me to see all the new creations I come up with!
Thanks Lisa for having me! I hope your new baby is nothing short of perfect, and I hope you are getting some sleep, at least a little!
I’m Randi and I blog over at Sowdering About in Seattle. I like to write about my crafty adventures in the Emerald City and all the usually stressful fun stuff I do with my kids.
Follow along on our adventure with us!


I'd love to hear your thoughts–leave me a comment!