
A while ago I felt like I really wanted to do something with my sewing to help someone. I brainstormed a couple of ideas (which I hope come to fruition) but before I could do any of them, I got an email from Kimbo from A Girl and a Glue Gun inviting me to join in her campaign for Lukes Loves and Project Linus. What is Luke’s Loves? Its a program that provides handmade blankets to children in need.

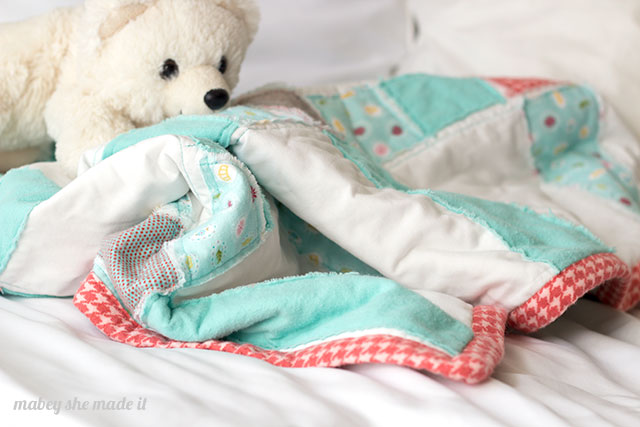
So today I have a blanket tutorial for you for a ragged appliqué quilt that turned out cute and is cuddly to boot. And in case you’re worried–don’t be. I am FAR from a quilter, but the beauty of this quilt is that its super forgiving–you don’t have to have perfect lines or anything for it to turn out super cute.

So let’s get started. You’ll need:
- 1 yard flannel for back
- 1 yard flannel for front
- 1/4 yard flannel in each of 4 prints
- 1/8″ loft quilt batting
- Spray basting
Fabric A:
- 30″ x 45″ for the back
- Three 3″ x 6″ blocks
- Four 3″ x 9″ blocks
- Eight 3″ x 3″ blocks
Fabric B:
- 30″ x 45″ for the front
Fabric C:
- Six 3″ x 9″ blocks
- Two 3″ x 6″ blocks
- Eight 3″ x 3″ blocks
Fabric D:
- Four 3″ x 3″ blocks
- Four 3″ x WOF strips for binding
Fabric E:
- Six 3″ x 3″ blocks

- With all your pieces cut, lay your quilt back right side down on the floor, and spray the wrong side with spray basting. Lay quilt batting on the quilt back, and adhere.

- Spray baste quilt front on top of your quilt back, then lay your blocks on the top of the quilt as shown.

- Pin all the blocks in place.

- On your sewing machine, stitch along one side of all the blocks in a row through all layers of the quilt using a 1/8″ or 1/4″ seam allowance. I used a stitch length of 3.2 and a walking foot to keep things going smoothly. Then sew along the other edge of the blocks. Do all the vertical lines at once.

- When all the vertical lines are done, turn the quilt and do the same thing for all of your horizontal lines, making sure all edges of the blocks are sewn down.

- Sew the four binding strips together to create your binding, then bind your quilt (this is a great tutorial for binding).

- Now its time to wash and dry it a couple of times to get the ragged look. When it comes out of the dryer, you’ll need to clip the long strings, but don’t trim any of the frayed edges–you want them to be ragged.
I love how snuggly this blanket is.

Would you like to join in? Handmade blankets are always needed, and if you want to use your talent to help others, this is a wonderful way to do it. Project Linus asks for New, Handmade, Washable blankets and afghans for children ages 0-18 (FAQs on the website!)

There are chapters all over if you want to donate locally (http://www.projectlinus.org/volunteer/) or you can send blankets here:
ATTN: Project Linus
4552 Independence
Chubbuck, ID 83202
And make sure you go check out all the other blanket tutorials–you can find them at A Girl and a Glue Gun!

I'd love to hear your thoughts–leave me a comment!